Create a new notification rule
If we want to breathe life into our reports and automate the sending process, we need a notification rule. We have already created the report itself in the previous chapter, now it's time to send it.
If you only want to send your report once as an attachment to an email, you do not need a notification rule. We only need this for regular sending (e.g. customer receives an event log every morning at 7 a.m.). For a one-off email, simply create a PDF as described here and send it by email.
Please note:
If your reports are more than 10 MB (ten megabytes) in size, they will no longer be sent directly, but an e-mail will be sent containing a link to download this report.
ATTENTION: This link is only valid for seven days!
To create a new notification rule, proceed as follows:
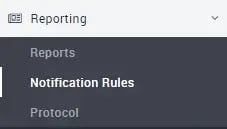
Log in to the portal and click on Reporting in the main menu on the left and then on Notification rules.
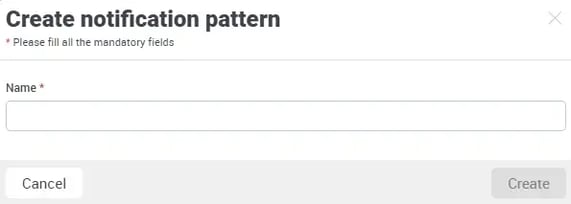
A list of all previously created notification rules opens, if you have already created any. To create a new notification rule, please click on the + Create notification rule button at the top right.

A pop-up window opens in which we enter a name for the notification rule and then click on Create.
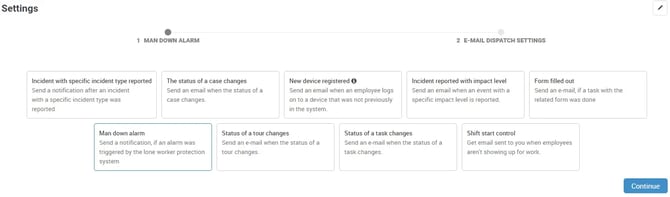
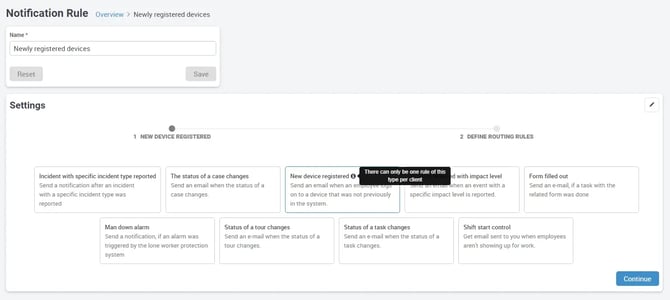
Please select the type of notification you would like to receive. The following topics can be the basis for notifications:
- Event reported with event type
- Status of a process changes
- New device taught-in
- Event with impact level reported
- Form filled out
- Alarm due to workstation protection
- Status of a tour changes
- Congestion of a task changes
- Shift start control

Under Incident with specific incident type reported, you are given a selection of event types that are to be reported automatically. Several event types can be selected.
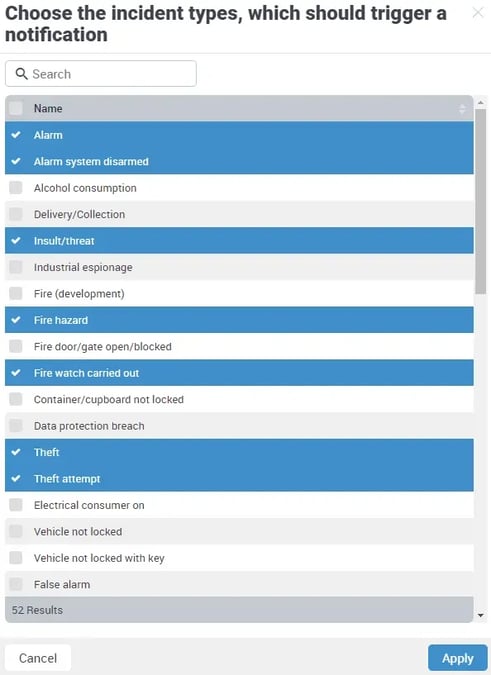
By clicking on Apply, you will see your selected event types as follows:
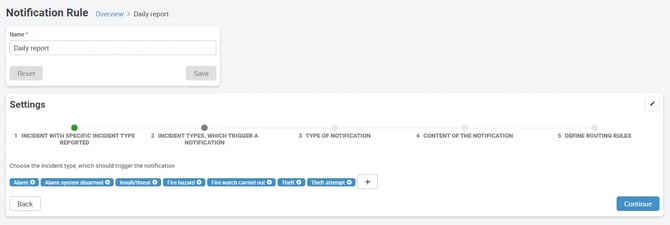
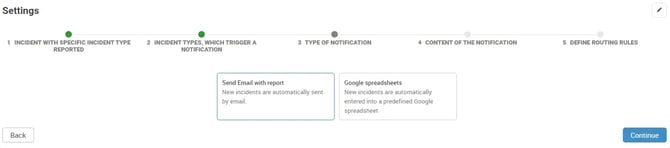
By clicking on Continue, you can select the type of notification. An e-mail can be sent here or new events can be automatically entered in a Google spreadsheet.
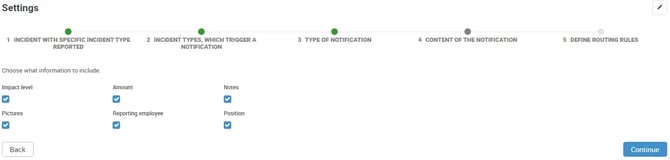
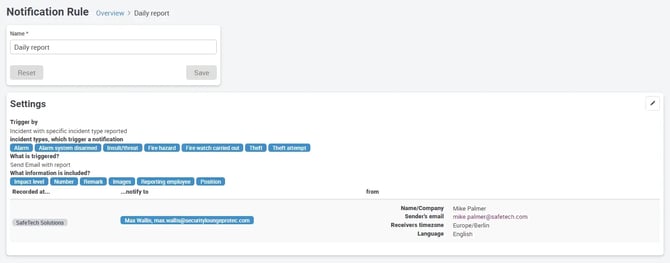
The next step shows the information that should be included. You can select and deselect these by clicking on them. This information is as follows:
- Impact level
- Amount
- Notes
- Pictures
- Reporting employee
- Position
It is important that you tick the assignment (as shown in the image above) from which the form is to be sent.
If you select the customer for the form dispatch, the forms are sent from all areas that are subordinate to the customer. If you select a single area, your forms will only be sent from this area, even if you complete the same form in another area of this customer!
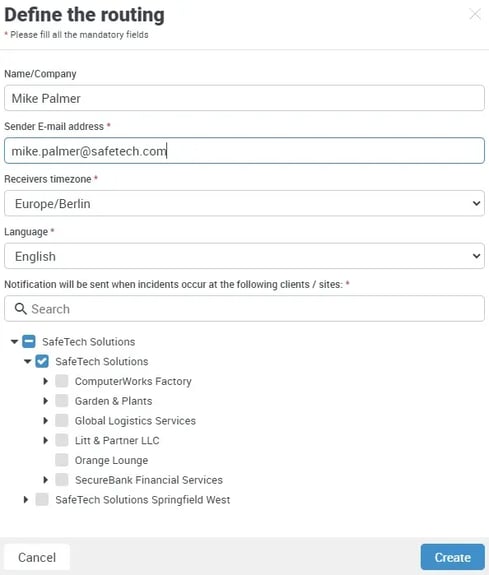
Once you have made all the necessary entries, you now need to specify who should receive the forms.
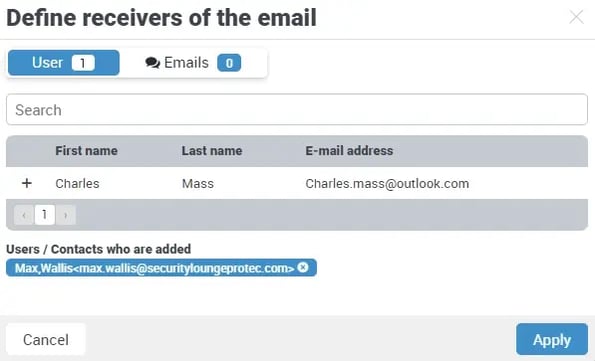
To enter an e-mail address that is not created as a user, write the e-mail address in the field and click on the green plus symbol and then click on Apply.
If you click on Apply again, the e-mail addresses entered will be displayed.
Please note that our system checks the format of the e-mail entered to ensure that the e-mail address used is also entered in the correct format. If you enter an e-mail address that is not recognized by the system, this symbol ![]() will be displayed.
will be displayed.
In this case, please correct your entry again.
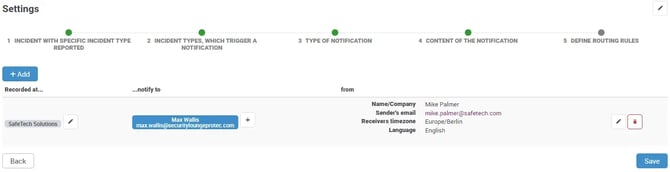
By clicking on the + symbol behind the recipient address, you can add further email recipients. After clicking on Save, your settings are complete and you will be shown a summary.
The setup for sending the forms is now complete.
Create notification rule for an alarm through workstation protection:
Enter a name for your rule:

Select Man down alarm:
Enter the sender and recipient in the fields above.
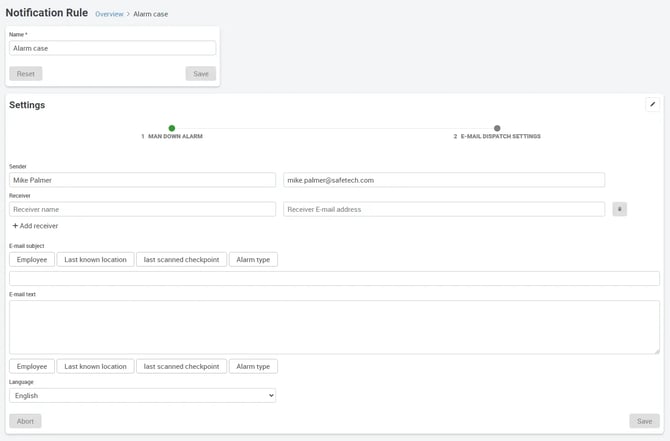
For the e-mail subject and the text content, there is the option of incorporating predefined tokens with variable data content. By clicking on these fields, you determine which information should appear in the subject line or in the e-mail text field:
- Employee: Which employee triggered the alarm
- Last known location: Where was the employee last
- Last scanned checkpoint: Which checkpoint was last scanned by the employee
- Alarm type: What type of alarm is it: Was the alarm triggered automatically or manually?
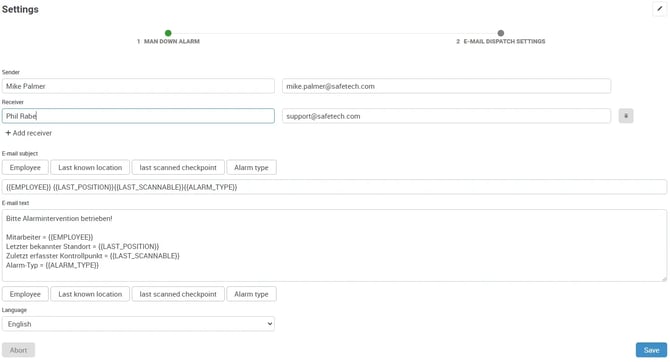
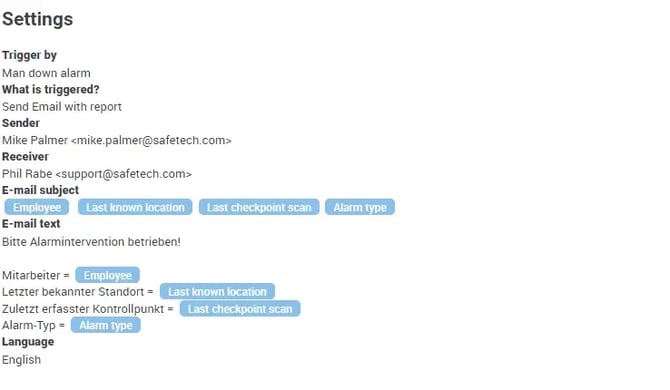
Once you have made your entries, simply click on Save. You will then be shown an overview of your settings:
New device taught in
If a user attempts to log in with a device that does not have a license, you can have an e-mail sent to you so that you are informed immediately.

To do this, simply + create a new notification rule as described above and then select New device learned in and click Continue.
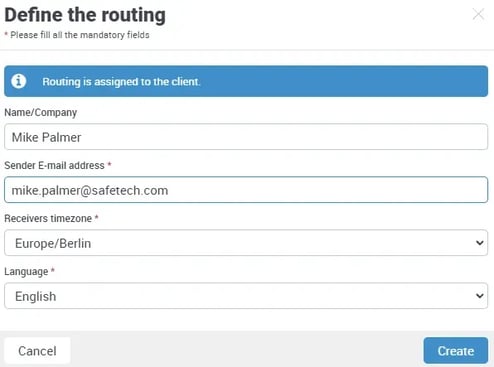
Now follow the settings again, where you must enter the sender and confirm with Create.
Then select who should receive this email. Click on the + plus symbol on the left next to ...notify to to add a recipient.
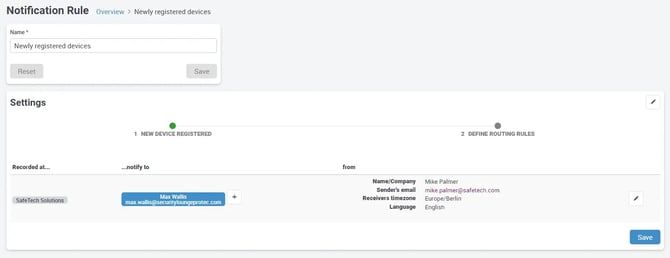
Now click on Save. That's it for this notification rule for newly registered devices.
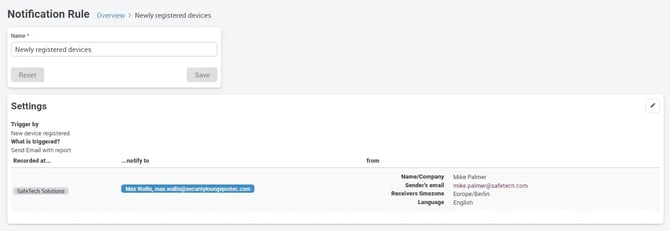
In particular, you may only create this notification rule New device taught-in once for your company! You may not create more than one of these rules!
Your notification rule setup is now complete.
The notification rules for other cases have a similar procedure.