To be able to make these settings, you must have the appropriate rights in the portal.
A time-controlled notification is always sent at a fixed time in a fixed rhythm set by you (no empty reports are sent if no events such as checkpoint scans or walkarounds have taken place).
If the notification is event-driven, the selected event must have occurred beforehand, otherwise no report will be sent. This article explains how you can create a notification rule to send an event-triggered report.
Create a time-controlled report
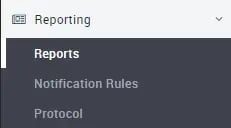
Please click on Reporting in the main menu on the left. Then click on Reports.
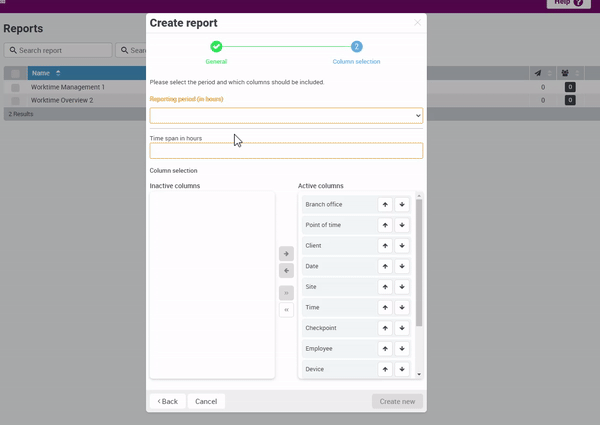
In the middle of the screen you will see any reports that have already been created and a blue + Create report button at the top right, which you should click on.

Next, please enter a name for the report and select the basis of the report in the following window. You can also select at this point whether the report should be output in CSV or PDF format.
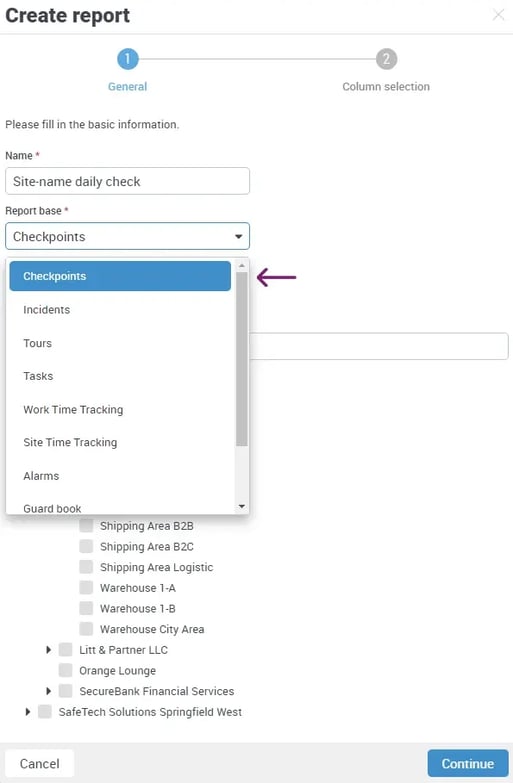
The basis is the actual content of the report. You must also specify the assignment for which customer/area the report is to be recorded.
If you set the assignment incorrectly, it can happen that your customer receives reports with content from other customers. This would be fatal under data protection law, so it is advisable to always create the reports individually for a customer's area!
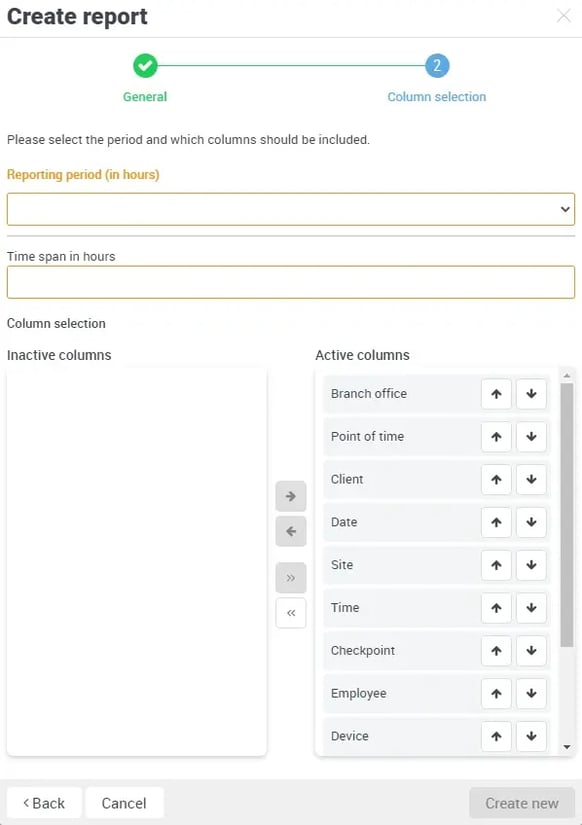
Once you have made all entries and assignments, please click on Continue at the bottom right to go to the next view, in which you should first enter the desired recording period for the report.
The following options are available:
- Yesterday (covers yesterday from 0:00 to 23:59)
- Last week (covers the period from last Monday, 0:00 to last Sunday, 23:59)
- Last month (covers the period from 0:00 on the 1st of the previous month to 23:59 on the last of the previous month)
- Current month (records the period from the 1st of the current month from 0:00 to the current date and time of viewing)
- Last quarter (covers the period from 0:00 on the first day of the previous quarter to 23:59 on the last day of the previous quarter)
- Current quarter (records the period from the 1st of the current quarter from 0:00 to the current date and time of viewing)
- Last year (covers the period from 0:00 on the 1st of the previous year to 23:59 on the last of the previous year)
- Current year (records the period from 01. of the current year from 0:00 to the current date and time of viewing
If you want a daily report, please ignore the top line and enter 24 for a 24-hour recording period in the line below. The advantage of this is that a shift after midnight is not torn apart in the report (this would be the case with yesterday). The last 24 hours are therefore recorded regardless of the time. The time of the dispatch rule is decisive here.
In the lower part of this view, you can now specify which data should be included in the report. By default, all data fields are always active and on the right-hand side.
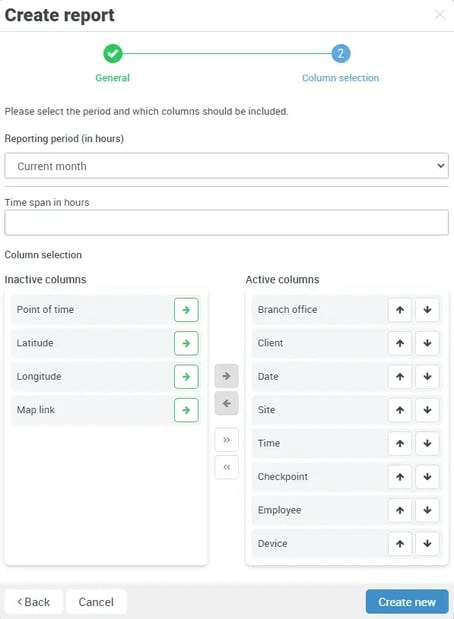
If you do not want certain information in the report (e.g. employees), click on the relevant field that you want to remove and then on the small black arrow in the middle of the columns pointing to the left. The Employees row is then moved to the left into the inactive column.
If you want to have the inactive columns in the report again, simply click on the green arrow to the right of the row and the row will be moved to the right again. You can use the small arrow symbols in the right-hand column to determine the order in which the data fields should be arranged in the report.
Here is a short summarized animation:
Click on Create new to display the overview for this report.
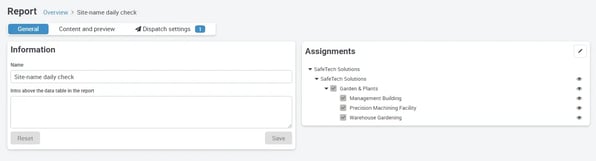
General information
At this point, you can change the name of the report and the assignments if required and also enter a table heading for the report.
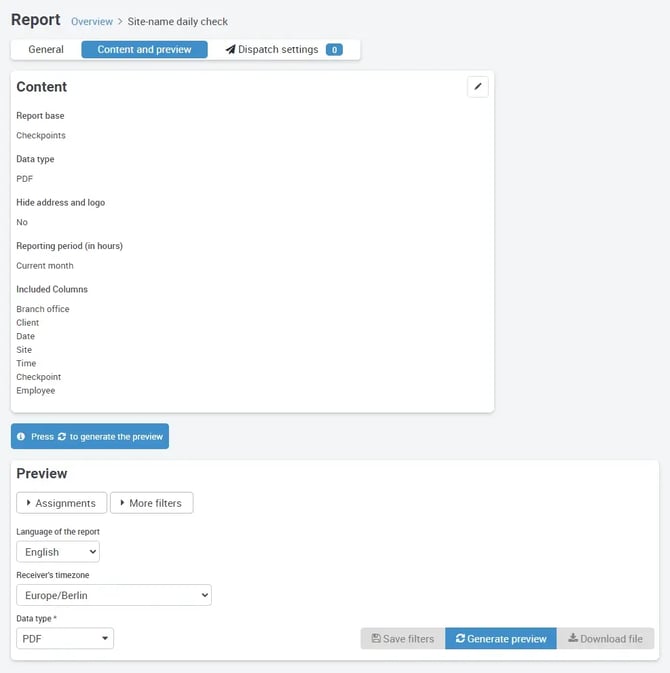
Content of the report
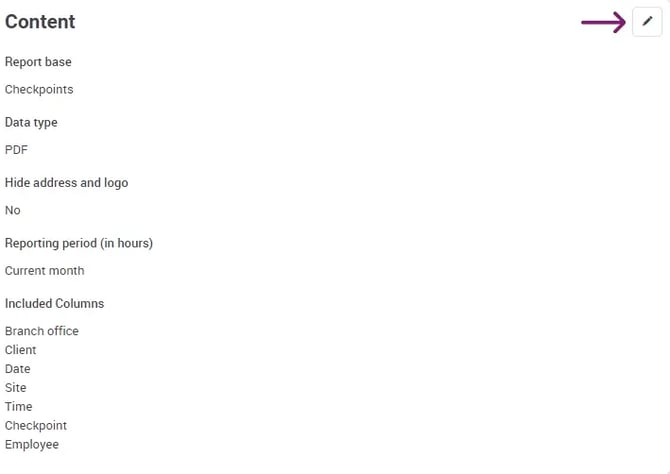
Here you can use the pencil icon at the top right to change fundamental data in this report, such as the basis of the report, the data type, time period and the active columns.
The report preview
Please click on Content and Preview and then on Generate Preview to display the last report for the period you entered. If no data has been entered yet, you will receive a message that the report is empty.
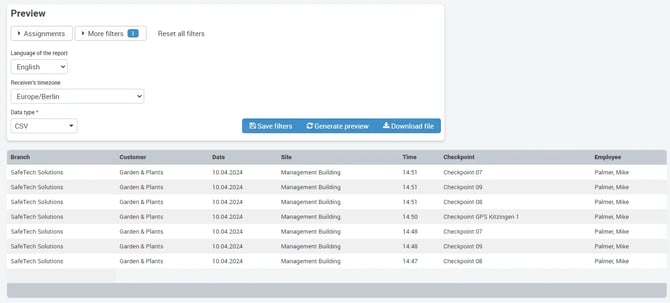
At this point, you can filter the report even more specifically. Simply select the desired filtering to be included in the report from the filter drop-down menu.
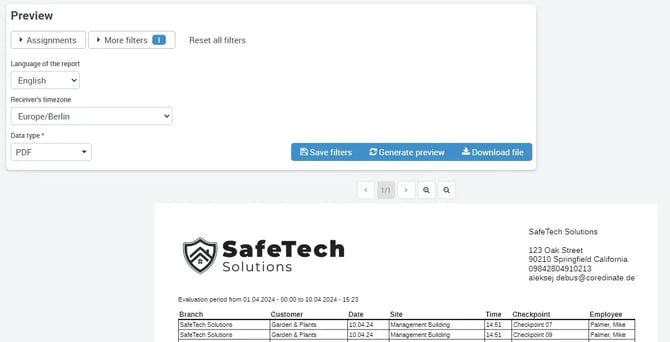
You can also filter by assignments if required.
If you do not use the filters (there is a zero after each filter), all data is always recorded depending on the previously selected columns for this customer or area.
If you set filters, the page refreshes automatically and you are shown a preview if data has already been entered. Here you can also download the report as a PDF file and send the report manually or archive it.
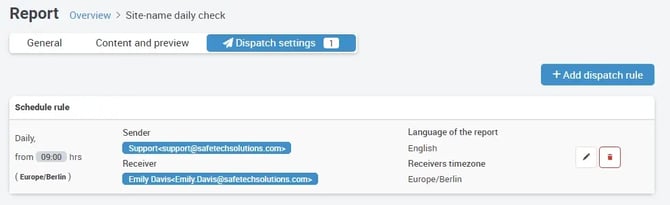
Versandeinstellungen für den automatischen Versand der Berichte
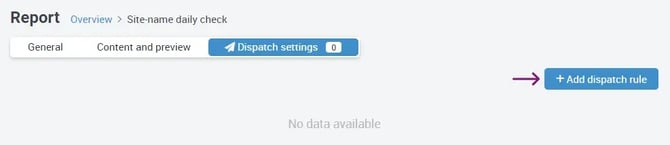
Click on the tab Dispatch settings and then on + Add dispatch rule to set up automatic report dispatch.
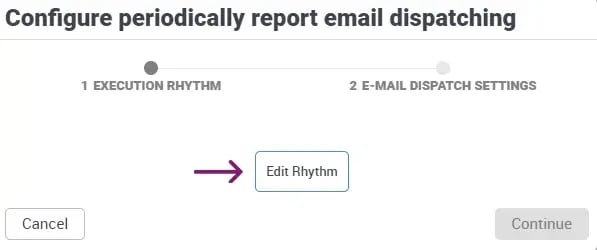
Click on Edit rhythm and you can configure your scheduling in this dialog box:
Daily before is always set as the default, as this is the most frequently used setting. The individual fields contain the explanations of which time setting you can use and when. For more information on scheduling and time planning, please click here.
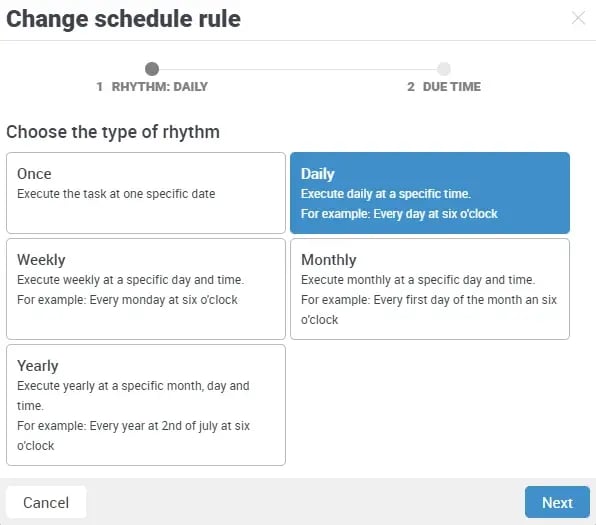
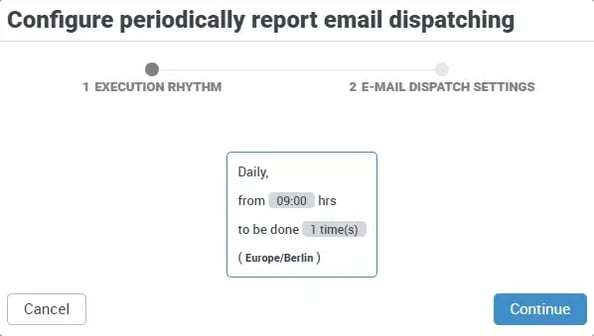
In our example, we use the daily sending of the report. Please click on the field at the bottom right which says Next and the window will appear where you can set the repetition rule:
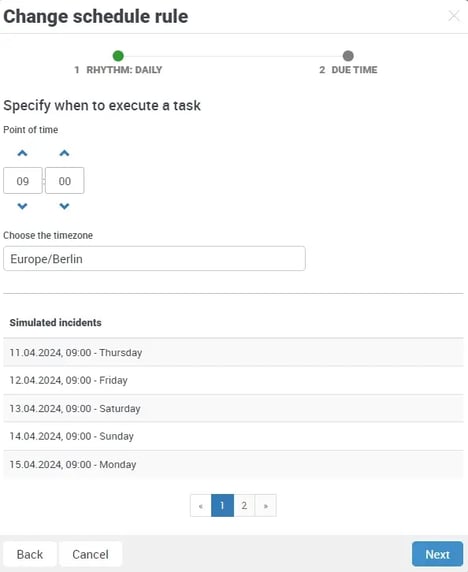
If you click on the arrow symbols above and below the time, you can correct it as you wish.
However, it is more convenient if you double-click on the time (it will then be highlighted in color) and then type it in directly using the keyboard. Once you have set your time, click on Continue at the bottom right to see when the report will be sent:
Finally, all you have to do is enter the sender and recipient and their e-mail addresses. You can add further e-mail recipients if required:
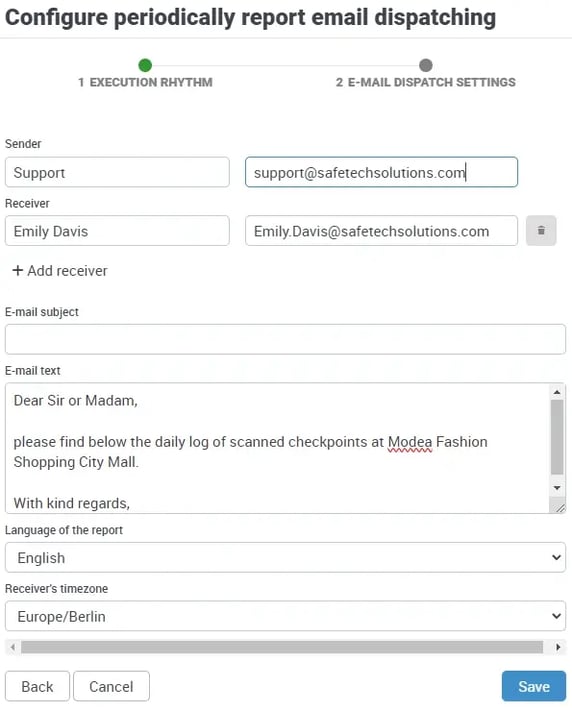
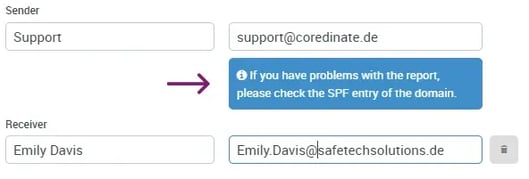
If you receive a message about the SPF record under the sender e-mail address, you can usually ignore it.
Once you have made all the necessary entries, click on Save, the settings are complete and you will receive your e-mails automatically as soon as data has been entered.