How to start and stop the time recording?
This can be done manually by the employee, automatically by scanning, or by a combination of both methods. The following practical examples are intended to illustrate this:
-
At the start of the shift, the employee scans a checkpoint in the gate and thus starts time recording. At the end of the shift, he stops the time recording by scanning the same checkpoint.
-
At the start of the shift, the employee scans a checkpoint in the gate and starts time recording. Since he has to end the shift unexpectedly in between, he stops the time recording manually via the app.
-
There are no control points in the object yet, so the employee starts the time recording manually and also ends it manually.
You decide whether the employee can also start and end his times himself within the app.
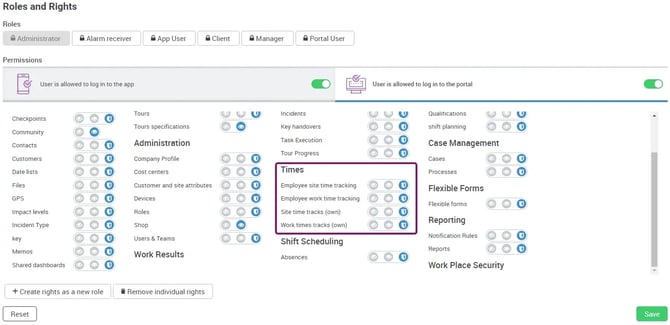
This is controlled by the COREDINATE rights system. If the employee has the View area time module or View working time module right, he can start and end times himself via the app. If you want this to be possible only by scanning a specific checkpoint, simply remove this right. You will learn how to do this in the next section!
Start and end of recording automatically by control point scan.
In this case COREDINATE takes over the thinking and starts or stops the time recording automatically whenever a certain control point is scanned.
The employee does not need the See area time module or See working time module rights for this method of time recording. It is enough if the employee only has the right to log in to the app.
-
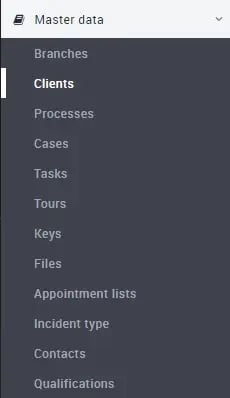
In the portal, open the corresponding customer in which the desired checkpoint is attached (Master data/ Clients).
-
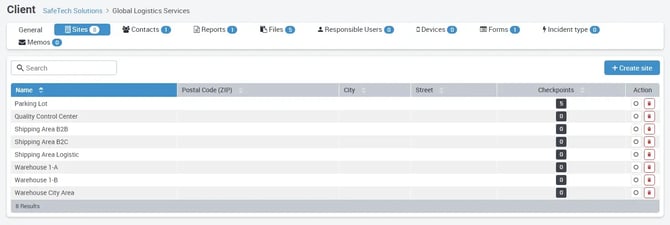
Within the customer, open the respective area.

-
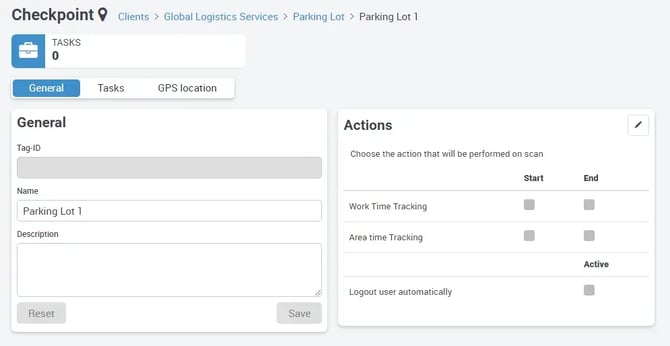
Within the area, click the name of the control point that should start and/ or stop time recording in the future.
-
In the detail view of the checkpoint you will find the following area:
-
Click the pencil in the upper right corner to open the edit view .
-
The edit view is active and you can specify exactly for the previously selected control point whether the working time and/or range time starts or ends during a scan.
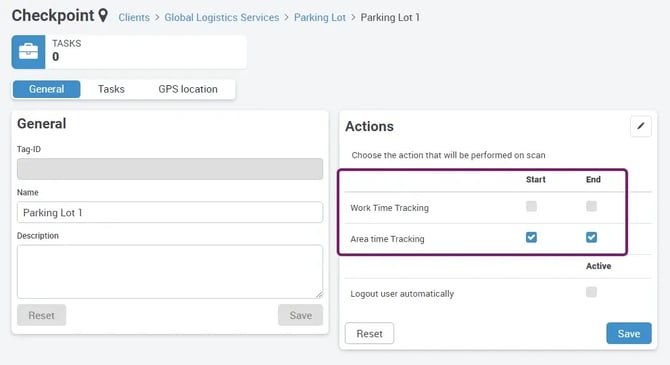
It is possible for a single checkpoint to both start and end time recording. If a check mark is set for both Start and End, COREDINATE will start recording on the first scan of that checkpoint and end recording on the second scan.
We do not recommend activating working time recording and area time recording at the same time.
This is also not necessary, because both time entries are identical, only with the difference that with the working time only the name and the time of the coworker stands and with the range time additionally the customer and the object with is spent.
Tip 1:
For an object, the area time is more suitable, because in the time recording the customer and the object are stored in addition to the name of the employee. So you always know exactly on which object the employee has performed his service.
Tip 2:
Do not include the control points that are to record the times in a tour. The times can be started via scan, but they can only be ended with a new scan when you are out of the tour again.
Working time recording in series through automatic logout.
An example: Place a smartphone in the entrance area of your company and let your employees start working time when entering and end it when leaving. The automatic logout function of COREDINATE also makes this possible for many employees in quick succession. So that the employee does not have to log out manually before the next employee can record his working time, there is a practical function in the COREDINATE portal.
If, for example, you need to record working or area times for an event, you can automatically record all employees almost simultaneously. For this, you need to change a setting on the checkpoint to use the function helpfully. Please select the function Automatically log off user in the checkpoint and set the switch to Yes.
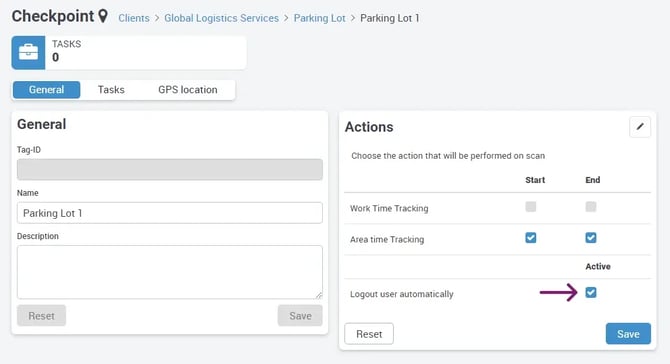
If this switch is active, the current user is logged out of the app whenever he scans this checkpoint. This also ensures that no unauthorized use is made of the device after it has been logged in and left lying around. Now employee 1 can log in to the app, scan the checkpoint, and the checkpoint will automatically log the employee out of the app again.
However, time continues to run for the employee.
Then employee 2 logs into the app, scans the checkpoint, employee 2 is also logged out of the app again automatically, the time now continues to run for employee 2 as well. You can do this with as many employees as you like.
Once the event is over, employees log back into the app, scan the checkpoint again and time tracking stops for the employee, the employee is automatically logged out of the app again and the next employee can log into the app, scan the checkpoint, etc.
If you use separate checkpoints for time recording, time recording will start only once (e.g. 08:00, even if you would scan this checkpoint again at 08:05) and will not stop until you scan the Go checkpoint or click the Stop icon in the portal.
You should NOT use these time tracking checkpoints with automatic logoff in a tour, because you would never be able to complete that tour because the employee would always be logged off when the checkpoint is scanned.
Start and end of recording by manual booking via app.
If you wish, your employees can also start and stop time recording manually via the app. Of course, this requires that your employees think along with you and also press the button in the app when the time recording is to start or end. If you have any concerns here, the automatic variant mentioned above is recommended.
In order for your employee to be able to book his times manually in the app, he needs the corresponding right in the user administration. You can manage this right as follows:
-
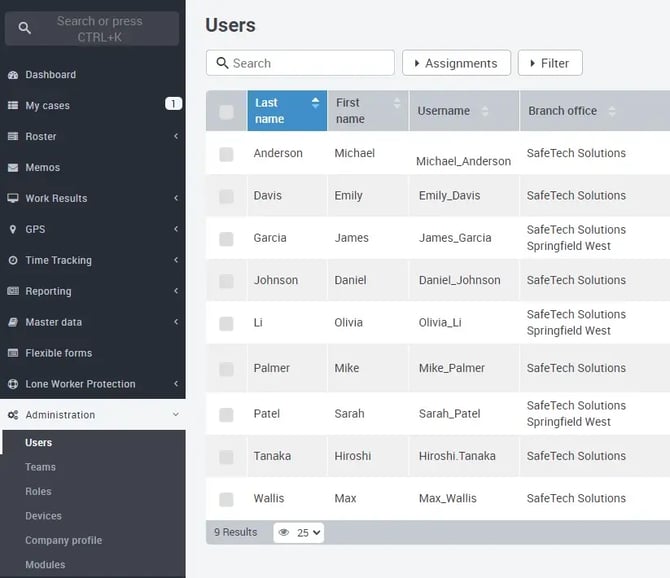
In the portal, under Administration, open the Users area.
-
Open the respective employee by clicking on the name.
-
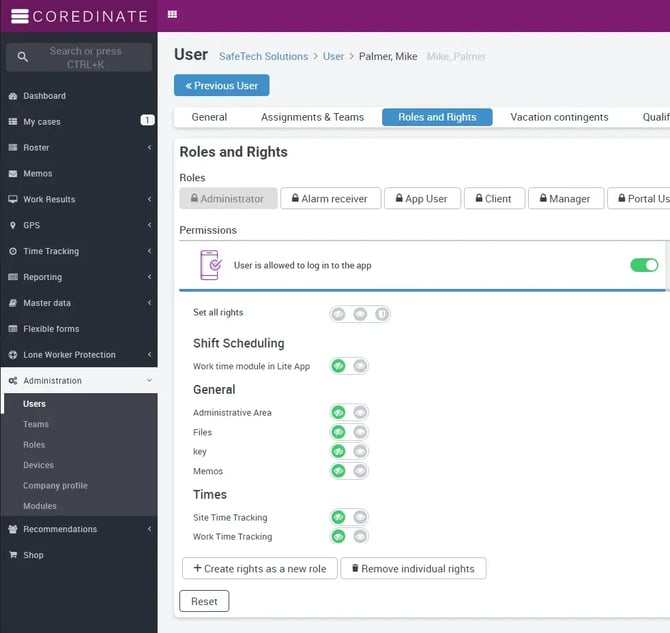
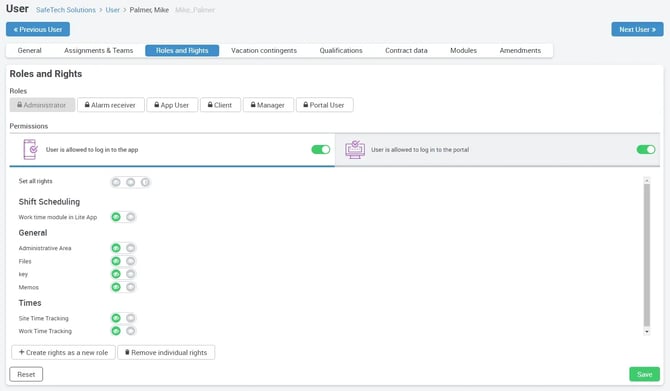
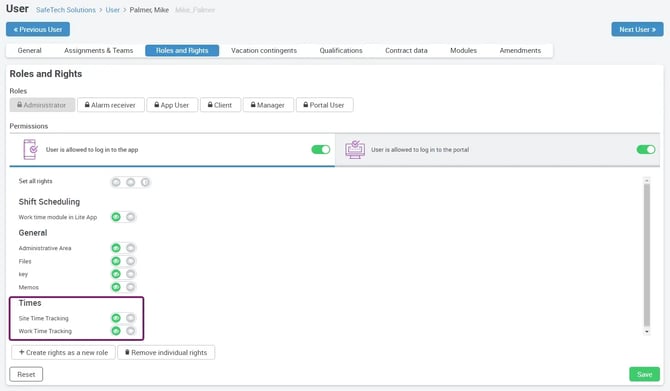
In the detailed view of the user profile you will find the tab Roles and rights on the right side, which you please click on.
-
Now define which rights the user should have in the app. You can define this via the pre-set Roles, or individually by clicking the buttons for the app or for the portal. Only for time recording it is sufficient to set the rights as shown in the picture above. Just click on the red button at User is not allowed to log in to the app, the button turns green and it now says User is allowed to log in to the app.
-
Now, in the area that affects the app's rights, specify whether the employee should have access to the working time and/or area time record.
The individual employee cannot make any changes to the times already recorded via the app! The times can only be started and finished by him. Nevertheless, a subsequent correction or even addition is possible via the portal. You will learn how to do this in the next section.
Start and end of recording by manual booking via the portal.
As with almost all COREDINATE entries, you can make corrections via the portal if necessary, provided you have the appropriate rights. Proceed as follows:
In the portal under Administration/ User, make sure that you have the appropriate rights (the respective time recording must be set to Manage, otherwise no new entries or changes can be made).
In the portal, switch to the Times section in the main menu on the left and then to Working time recording or Area time recording (depending on what you want to record).
A list of all times recorded so far opens, now click on the button Create area time recording.

A dialog will now open in which the relevant employee for whom the times are to be recorded is first selected - in the case of area time, select the area and the employee here.
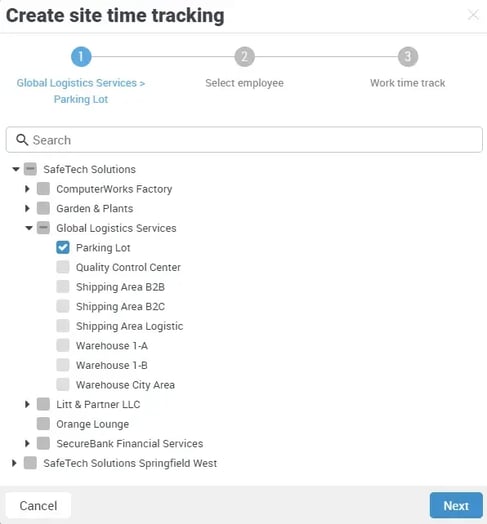
Select the desired area and the desired employee,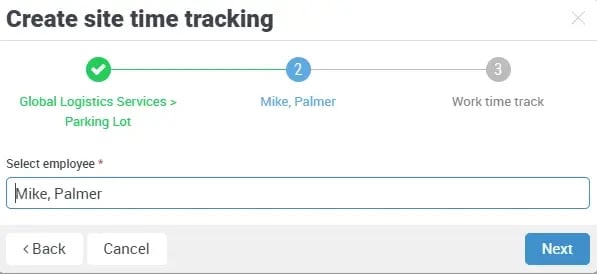
enter the start time and date and click on Create.
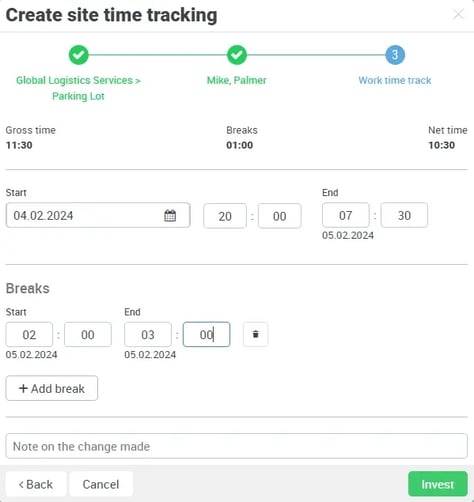
After you have made all the entries, click Create and the time tracking has already been started. If a time is recorded in this way, it will be displayed in the portal as Changed. On the other hand, if you use the Come button in the portal, Started is displayed there. You can stop the recording at any time using the Stop button at the end of the newly inserted line.
The right Manage own range time enables the creation of punch entries
A user can now create punch entries with the right Working times (own)/Area times (own), which are in the past, so that time periods can be entered subsequently.
Of course, the time recording you started via the portal can also be deleted or edited at any time. You can find out how this works in this aticle .