There are two ways to create, manage and change GPS control points in tours and how to use different map views.
In this article we will explain how to create, manage and if necessary change the GPS checkpoints.
GPS – checkpoints are only available in tours!
There are several ways to create GPS checkpoints.
Possibility 1:
Create GPS checkpoints directly in the customer's area
Go on the left side in the main menu under Master data,
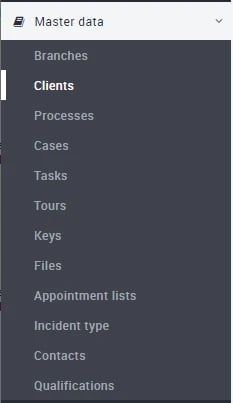
select a customer and an area or select an already created area.
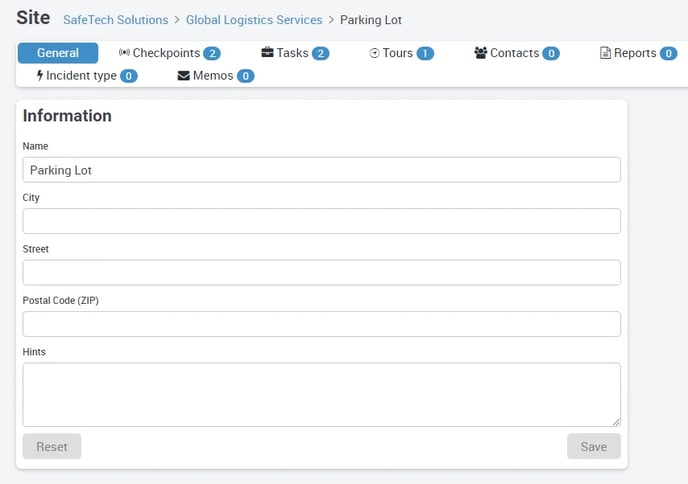
Navigate to checkpoints. Now click on + create GPS checkpoint and enter the name for the GPS control point in the following pop-up.
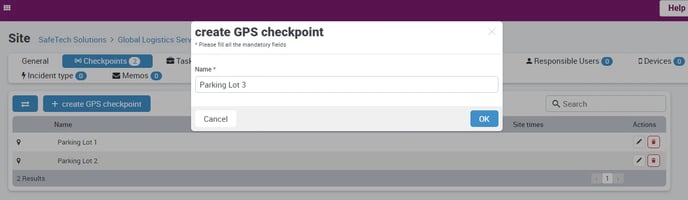
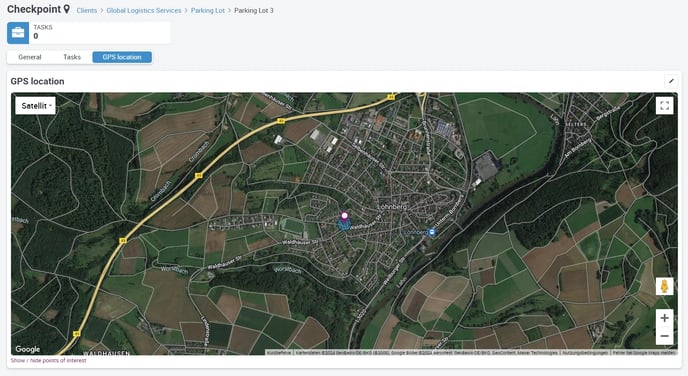
After entering the name, click the OK button at the bottom right, the edit view of the GPS checkpoint will open:
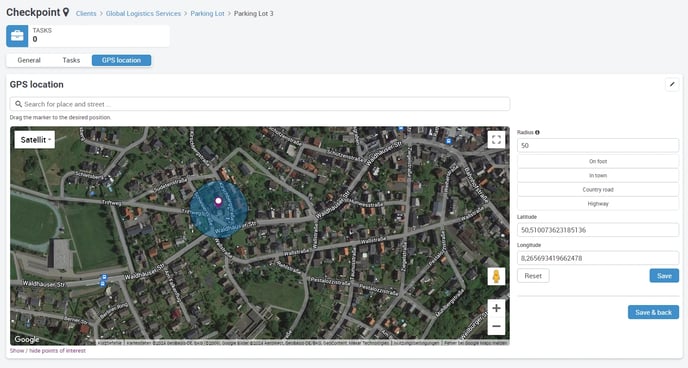
Either enter your desired address in the field above the map or drag the marker in the map to the desired position or enter the coordinates to the right of the map at Latitude and Longitude directly, the marker will now jump to the desired position.
You can enter the radius in digits via the input field. This radius is used to set from which position the GPS checkpoint can be detected.
In this context, we can give a recommendation for the radius, which, however, can differ significantly due to the hardware used, the local conditions and the location where the employee wears the mobile device.
20 meters for pedestrians (smaller settings up to 5m possible)
40 - 50 meters in town
75 - 80 meters overland
from 100 meters highway
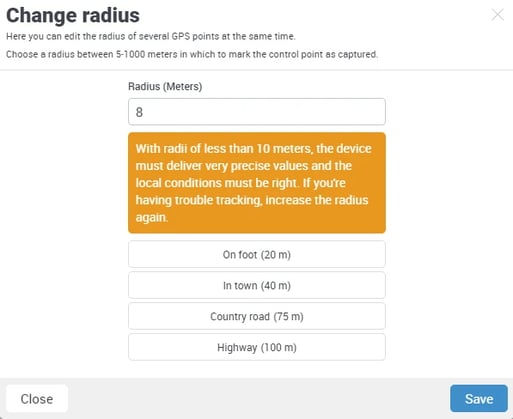
If radii of less than 10 meters are used, you will receive a warning that smaller control points may no longer be detected reasonably! In this case you have to increase the radius again!
The GPS checkpoint behaves like a real checkpoint in most aspects, so it can also record working and area times, but it can also include tasks that the employee must perform. When you have entered all the data, click on Save and the GPS checkpoint will change to the following view:
If you still want to make a correction, click on the small pencil in the upper right corner above the map and the edit view will open again.
Possibility 2:
Create GPS checkpoints directly in the tour
Please click in the main menu on Master data – Tours
You will now see your list of created tours.


If you have not yet created a tour, it is of course still empty. In this case, please create a new tour. Now please select the tour in which you want to create a GPS checkpoint and click on it. Now you are in the General view of the tour.
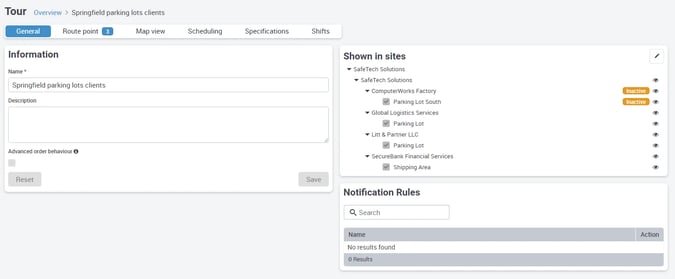
Please click on the Map View tab,
![]()
![]()

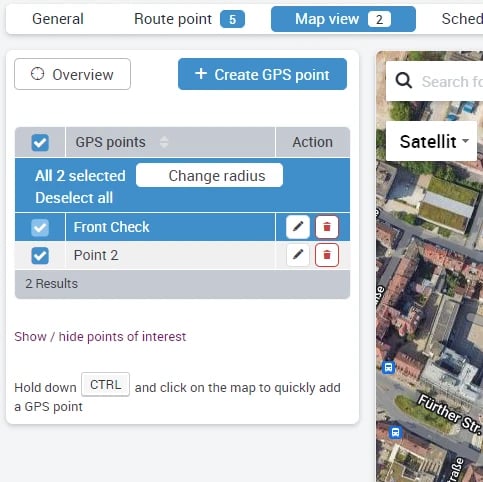
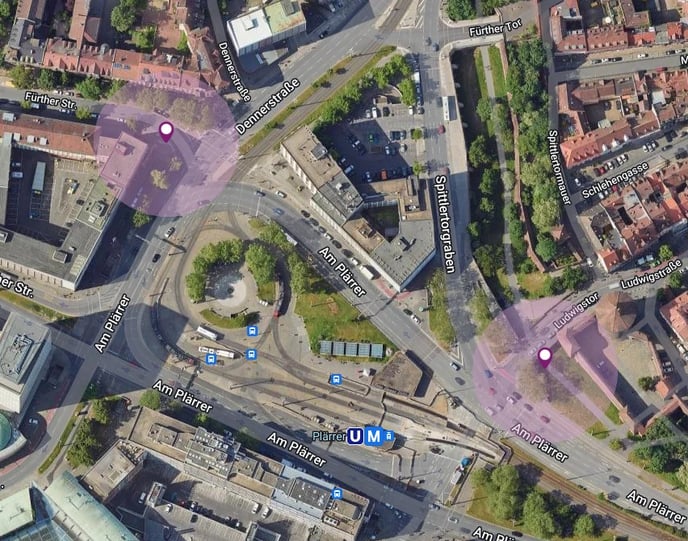
You will now see a map and all the GPS control points that have been taught in so far. If you have not yet created any GPS checkpoints, the list on the left is of course still empty and you will not see any GPS checkpoints on the map.
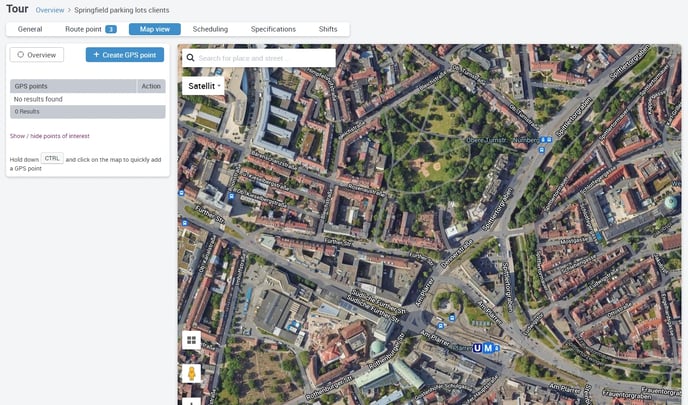
Here you now have two options to create a GPS checkpoint:
1. You click + Create GPS point on the top left of the map, a marker appears on the map, which you can move directly with the mouse on the map,
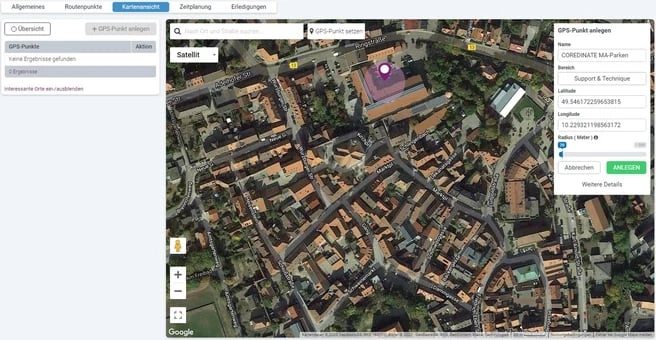
- or you can enter an address at Search by city and street (then click on Drag GPS point here) and the marker will jump to the entered address.
- or you press the CTRL key on the computer keyboard, a cross cursor appears on the map, when you are at the place where the marker should be placed, click the left mouse button and the marker will be placed there.
- alternatively, you can directly enter coordinates at Latitude and Longitude.
Click and you will see all the information about the GPS checkpoint in the following image and the information at the bottom right that your entries have been successfully saved. If you have created multiple checkpoints and want to view them all on a map, simply click Overview on the top left above the list of checkpoints and you will be shown all the GPS checkpoints you have created. If you click Cancel, you will see the overview again.
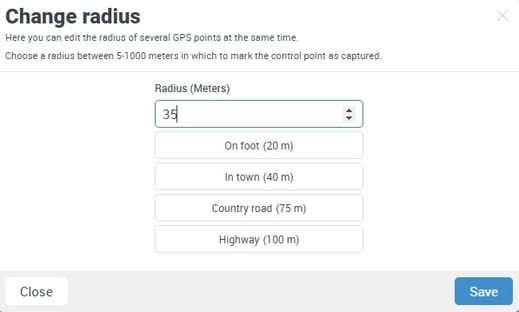
If you want to conveniently change the radius for certain or all GPS checkpoints at once, simply click on the desired fields in front of the checkpoints in the list of checkpoints on the left (here the radius is set to 50m for all GPS checkpoints),
then click on Change radius and enter the desired radius in the following popup or simply click on one of the four defaults.
Values below 5 meters cannot be entered!
If you enter values below 10 meters, you will receive a warning:
Once you have entered your desired value, click on Save in the popup and you will immediately see the change in the map.
In case you prefer a normal map view – e.g. for speed reasons – just click on Satellite in the upper left corner of the map and you will see a selection where you can switch to the map view.
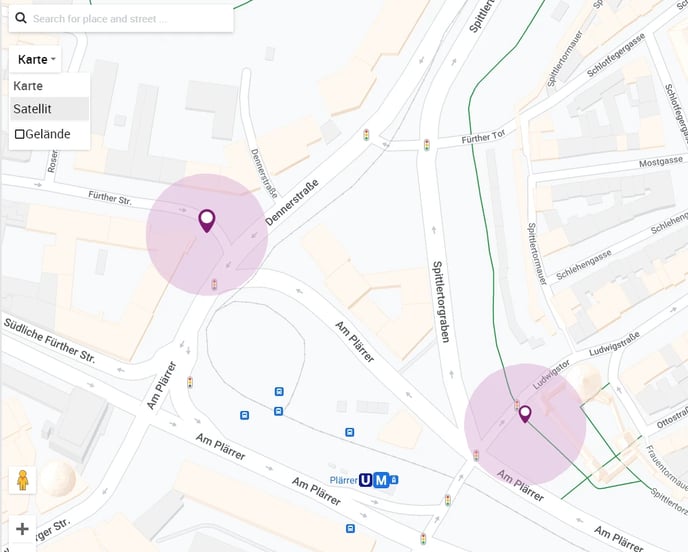
In this menu you can show/ hide labels or activate/ deactivate the terrain view of the map. Furthermore, you have the option to use Show/ hide interesting places to display them on the map.