In the company profile, you can manage company information, logo, contact details, customer/area attributes, payment method, cost centers and IP restrictions.
In this post, we'll explain how to design your company profile.
Please log in to the portal (if you have not already done so) and click on Administration in the main menu on the left and then on Company Profile underneath.

On the right side you will see all the information of your company, which you can change in detail according to your needs by clicking on the individual tabs and then by clicking on the small pencils.
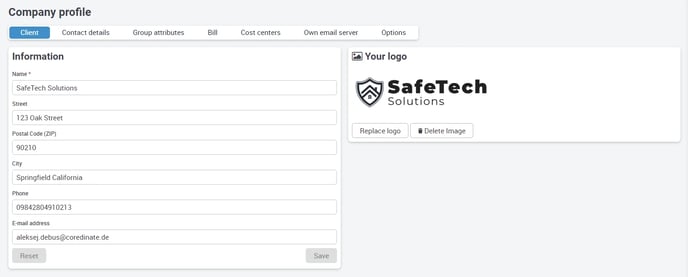
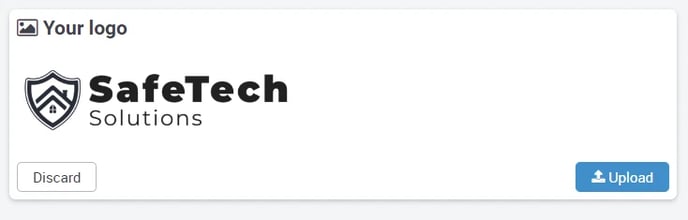
If you want to have your company logo in the reports, you can insert and upload it here. To do this, please click on the gray shaded field and an explorer window will open or you can also drag it directly into the gray shaded field using drag'n'drop.

Once you have selected your logo, please click Upload and your company logo will be displayed in the reports in the future.
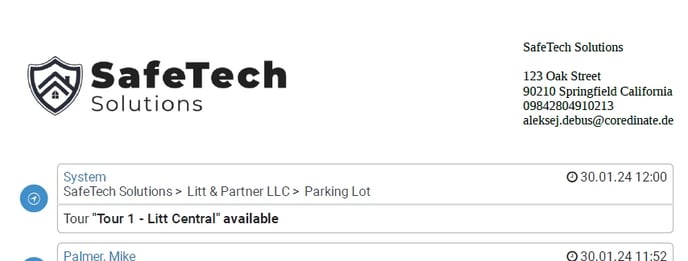
On the top left you will see your logo, on the right your company address and phone number and then – depending on which report is created – the data included (example here: checkpoint scans).
To change the contact details, you can click on the Contact details tab on the right and change these details if necessary.

Custom fields (group attributes)
Add to the customers or areas
By clicking on the tab Group attributes you can add records (so-called attributes) to the information of the customers or the areas.

Now click on + create customer attribute to create a new record for your clients. After entering the desired record(s), you can make the changes by pressing with okay, or you click abort to discard the change. The same applies to range attributes. If you want to add a new record to the area, click + Create area attribute.
You can edit the informations (e.g. if you have mistyped it), or you can click on Reset delete the complete entry again, then the respective attribute is empty again. You also have this view in the customer attributes after accepting. You can create several new customer and/or area attributes, e.g. telephone number or similar. You can now see the new attributes under Master data – Customers, where you can now make your entries.
A click on Save at the bottom right saves your entry. It is the same for the areas; you can see the new attribute under Master data – Customers – Areas, make the entry for it and save your entry. Your new attributes are visible with all customers and in all areas!
Invoice
After clicking on the tab Invoice you can change your payment method. If you no longer want to transfer the license fees manually each time, you can issue the SEPA direct debit mandate here and your license fees will be conveniently and automatically debited by us.
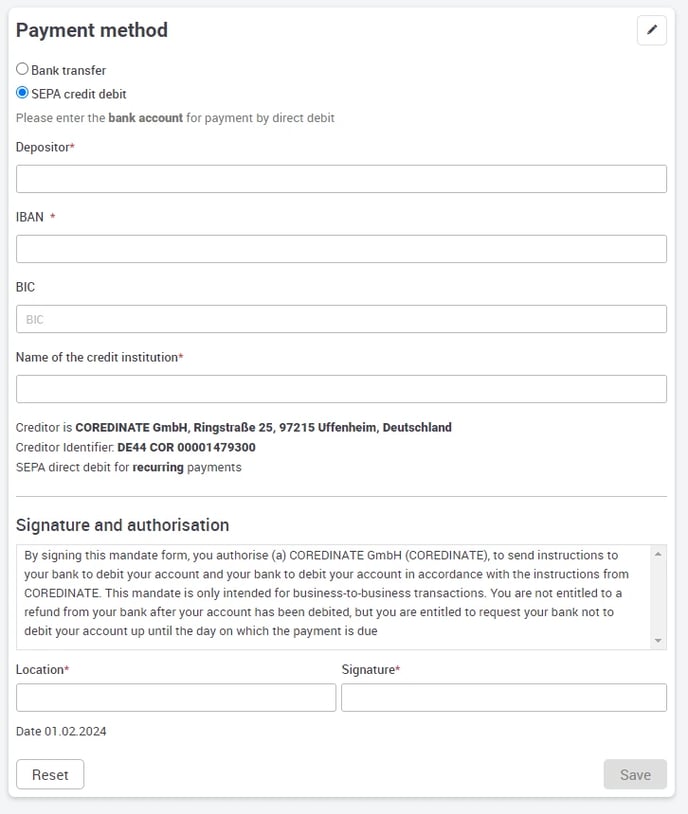
The fields outlined in yellow are mandatory fields. If you want to debit within Germany, you do not need to fill in the BIC. If you do not have to pay the invoice yourself, but e.g. the head office of your branch, you have the possibility to specify a cost center. To do this, simply click on the tab Cost centers.
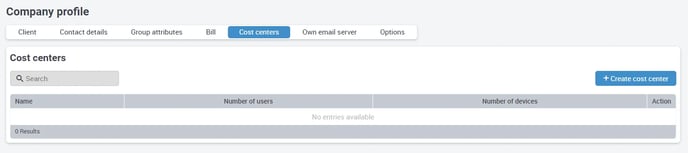
Then click on the + Create cost center symbol on the right. A pop-up opens where you can enter the cost center and a reference number. Repeat this until you have created all the cost centers you need and want to assign later.
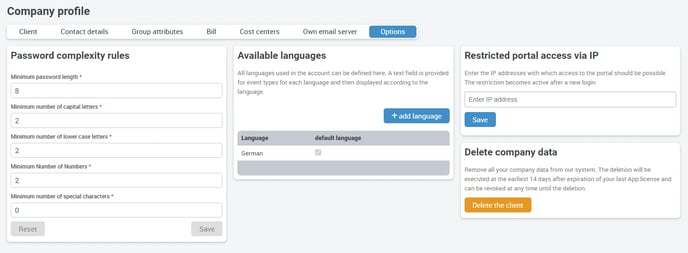
Options
If you select this, you have the option here to
-
Set a certain group of computers so that only they can access the portal and
- Set the password complexity
- Manage available languages
-
Have your company data removed from the portal.
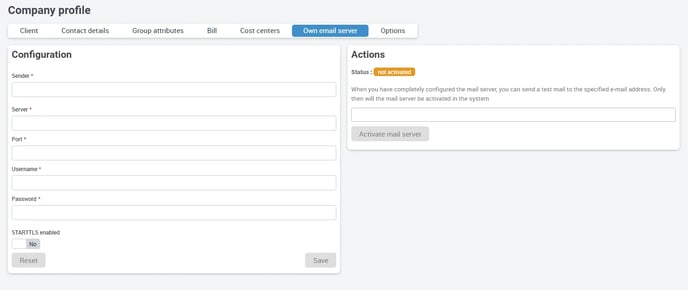
Own email server
Info:
The IP address restriction applies to the company's gateway. This means that the IP address of your router, which is visible to the outside, is entered here so that no one outside your company can log into the portal. An assignment to individual computers within a company network (subnet) is not possible, since the IP addresses of these computers are not displayed externally!
If you want to enter several IP addresses, please separate them with a comma.